Thursday, July 06, 2017
Tuesday, October 04, 2016
4-color Super Scarf pattern
Crochet hook G or H
1 skein each of 4 colors
1. First thing you do is pick 3 or 4 colors you like, coordinating, contrasting, or just colors that go together. Mine were black, gray, yellow and white. All were Red Heart with Love because of the softness and body.
2. How long do you like your scarf? Because this is a super scarf, the new in-thing now, I made mine 80 inches long, perfect for my 5 foot height. I crocheted a chain that long.
3. Hdc (half double crochet, US terms) in the 3rd ch from hook and in each and every chain to the end.
4. Ch 2, turn. Hdc in same stitch and in each and every st to the end. The ch 2 is never counted as an hdc, simply a turning ch. You won't put a stitch on it on your next turn.
Repeat #4 until the scarf is as wide as you want it.
Here's my color arrangement:
1 row black
3 rows gray
3 rows yellow
4 rows white
3 rows yellow
3 rows gray
1 row black
That's it! Easy
Tuesday, July 23, 2013
Purl 1 color Dishtowel pattern
(c) Vicki Suan
Materials:
4 oz Variegated cotton yarn
US 7 knitting needles
Gauge: 5 stitches per inch, stockinette
Directions:
Cast on 50
1. Knit 4 rows
2. (RS) Knit
3. (WS) Knit 3, purl 44, knit 3
4. Repeat rows 2-3 until piece is 22" long.
5. Knit 4 rows
6. Bind off
Note:
Again, you want the purl bumps to show on the right side. The color I picked to purl is the coral color (see picture). While working on the right side, as I came to the coral color, I knitted it first. After I turned the fabric to work on the wrong side, as I came to the coral, I knitted it as well, to make the purl bumps appear on the right side.On the same note, as I was working on the back side of the dishtowel, I purled the coral color as I came to it. When I got to the right side, I purled the coral again, making the purls appear on the front side of the towel.
Clear as mud? Play with it. There are no set rules. I simply wanted that one color to be more prominent on the right side. Make a comment if you have questions and I'll get back to you.
Wednesday, March 02, 2011
2 Chunky Skeins Cowl
Ingredients:
2 skeins chunky yarn in contrasting or coordinating colors
109 yards Main Color (MC), white
109 yards Contrast Color (CC) brown
US size 10.5 circular needles
Written out instructions: (see following chart)
1. Cast on 84 sts using MC. Join in the round without twisting the stitches.
2. k2 p2 to the end (MC)
3. * k2 MC, k2 CC, rep from *
4. * k2 MC, p2 CC, rep from *
Repeat 3-4 one more time
5-6. K around using MC
7. *k1 MC, k1 CC, k2 MC, rep from *
8. * k3 CC, k1 MC, rep from *
9. repeat round 7
10. k around using MC
11. *k3 MC, k1 CC, rep from *
12. *k1 CC, k1 MC, k2 CC, rep from *
13. repeat rnd 11
14. k 1 round using MC
You can repeat rounds 7-14 until you're ready to do the ribbing or until you're almost running out of yarn. Or, as an alternative design, switch the colors, making brown as the background color.(see sample picture)
15: K 2 rounds using MC
16: repeat round 3
17: repeat round 4
18-19: repeat 3 and 4 one more time
20: k2 p2 to the end using MC.
Bind off in K2P2
KEY CHART
CHART
Tuesday, February 17, 2009
Tawashi
Ahhh, these things fascinate me! They are simply dish scrubbies (scrubbers) in Japanese. So I designed one. After crocheting one in 5 minutes, I was aghast. Oh my! It's easy. And used up all my tiny bits of cotton yardage leftovers.
Note: This is a very rough draft and is currently being tested. However, if you guys want to try it, go for it. I love feedbacks!
 Front
Front the back (see the ridges? Perfect for scrubbing those dishes)
Oh MY!Tawashi ( crocheted scrubbie)
© Vicki Suan 2009
US size G crochet hook
a few yards of cotton yarn or acrylic
Abbreviations:
Ch – chain
Sc – single crochet
dc- double crochet
st- stitch
sp – space
Fpdc – front post dc
Fpsc- front post sc
Round 1: Ch 4. In 4th chain from hook, crochet 9 dcs. Join with a slip stitch to the top of ch 3. You now have a total of 10 dcs in the ring including the ch 3. From now on, every ch 3 counts as 1 dc.
Round 2: Ch 3. Fpdc around ch 3 below ( in round 1). * Dc in next dc. Fpdc around the same dc. (Do you see what you’re doing now? Round 1 has 10 dcs. You want to increase to 20 dcs in round 2. You are doing 1 dc and 1 Fpdc in each st to make this possible ). Rep from *. Join to the top of ch 3. (20 sts)
Round 3: Ch 3. In the next st, make 1 Dc and 1 fpdc (inc made) . * Dc in next dc; in the next st, make 1 dc and 1 fpdc (inc made in same st) **. Repeat from * to **. Join to top of ch 3. (30 sts)
Round 4: ch 1, sc in same sp; fpsc in same sp. * sc in next st, fpsc in same st; (60 scs). Join with a slip st to first sc.
Loop: Ch 20 and form a loop for hanging. Weave in ends.
This is a free pattern and must remain so. Can't be sold. If you want to share with a friend, point them to my blog. You may however sell items you make from this. Enjoy!
Thursday, February 12, 2009
Turtle Tracks Cowl (knit) Free Pattern


This stitch is based on Barbara Walker's Track of the Turtle stitch pattern. Kathy Wesley of Creative Knitting Magazine (March 2005 issue) has a sock pattern called "Curvy Lace Socks". That pattern uses the same stitch. Permission has been obtained to adapt that stitch with this cowl.
Here goes:
(c) Vicki Suan 2009
2 skeins Lion Brand Cashmere
US size 8 circular needles (5 mm)
Cast on 90 (99 for looser fit). Join, making sure the stitches are not twisted.
K1 P1 rib for 1 1/2 inch . Or you can do seed stitch instead of rib .
Start pattern. This is a multiple of 9 stitches.
1st round : Knit all stitches
2nd round and all even rounds: * P2, K7. repeat from *
3rd round: * K3, YO, K2, SSK, K2. repeat from *
5th round: * K4, YO, K2, SSK, K1. repeat from *
7th round: * K5, YO, K2, SSK. rep from *
9th round: Knit all stitches
11th round: * K4, K2tog, K2, YO, K1. repeat from *
13th round: * K3, K2tog, K2, YO, K2. repeat from *
15th round: * K2, K2tog, K2, YO, K3. repeat from *
16th round: *P2, K7. repeat from *
Rep rounds 1-16 for as long as you prefer. With my 2 skeins of LB cashmere, I stopped when I had just enough to finish the border.
For final border, K1 P1 rib for another 1 1/2 inch. Or you can do seed stitch. Bind off loosely.
Enjoy!
(c) This is a free pattern and is not meant to be sold. Please do not post this pattern on your website or blog. Better yet, just point them to my blog by including this link.
http://suanknits.blogspot.com
Note: I'm still trying to research how I can upload a pdf copy of this pattern on this blog. In the meantime, you can get it at Ravelry by clicking on this LINK.
Friday, January 16, 2009
Bottom Seam Baby Bootie - Free pattern
 (Sorry for the blurry image. I'm not good at taking pics.)
I'm sure someone can figure out how to make this a no seam baby bootie (what with those provisional cast on thingies) but I found it easier to just seam the bottom of the foot, after you finish knitting the bootie. I love hand sewing anyway.
Depending on the weight of your yarn, your needles will vary. And you will be using dpns and knitting this in the round.
US size 5 dpns (3.75mm)
Baby yarn
Abbreviations:
m1 - make one stitch This website has good instructions
K2T - Knit 2 together
ssk - slip, slip, knit This website has pictures
Instructions:
Cast on 35 stitches. Join in the round making sure the stitches are not twisted.
1. PURL
2. K1, M1, K16, M1, K1, M1, K16, M1, K1
3. PURL
4. K2, M1, K16, M1, K3, M1, K16, M1, K2
5. PURL
6. K3, M1, K16, M1, K5, M1, K16, M1, K3
7. PURL
8. K4, M1, K16, M1, K7, M1, K16, M1, K4 (51 STITCHES)
9. PURL
10. Knit 4 rounds
11. K21, K2T, K5, SSK, K21
12. K20, K2T, K5, SSK, K20
13. K19, K2T, K5, SSK, K19
By this time, you can see that the stitches are deceasing by one before the K2T and after the SSK. So, continue in this manner (rounds 14-21) until you reach...
22. K10, K2T, K5, SSK, K10 (27 stitches)
23. K12, K2T, K13 (26 stitches. Yes, we want an even number of stitches at this point)
24. K1 P1 rib for about 1 inch, or 6 rounds. If you want to fold down your cuff, you can make this longer.
25. Bind off in rib. Weave in ends and don't forget to seam the bottom of the bootie.
Enjoy! Post a comment if you have any questions, corrections, etc etc.
I want to thank Thata Pang and her blog for the inspiration in knitting the bottom of the bootie. She has a different style bootie pattern on her blog, if you guys want to try it.
Saturday, December 27, 2008
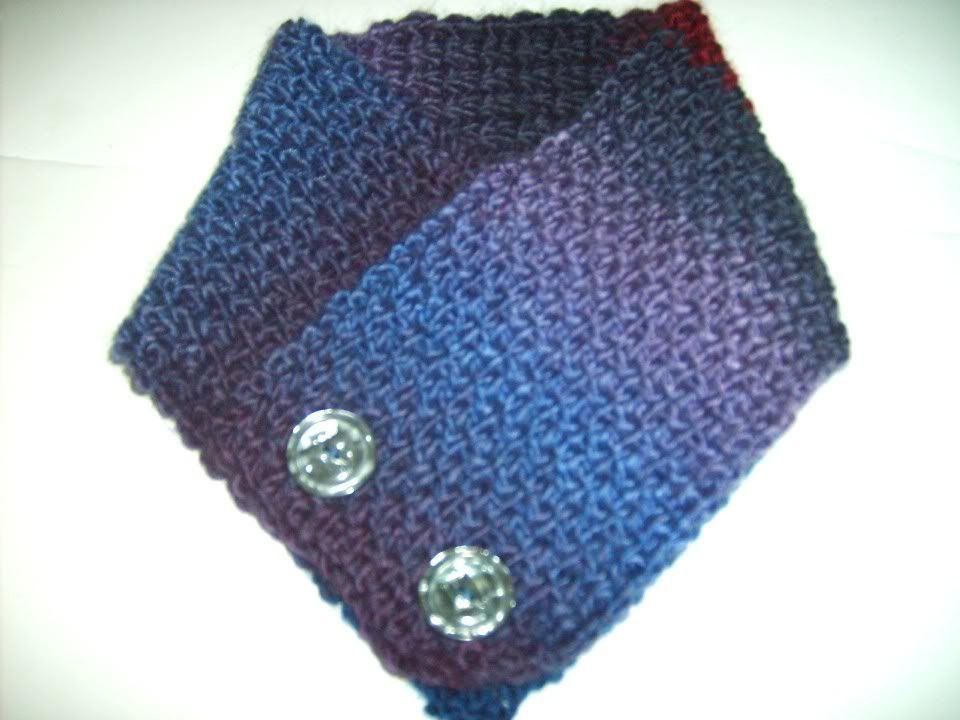
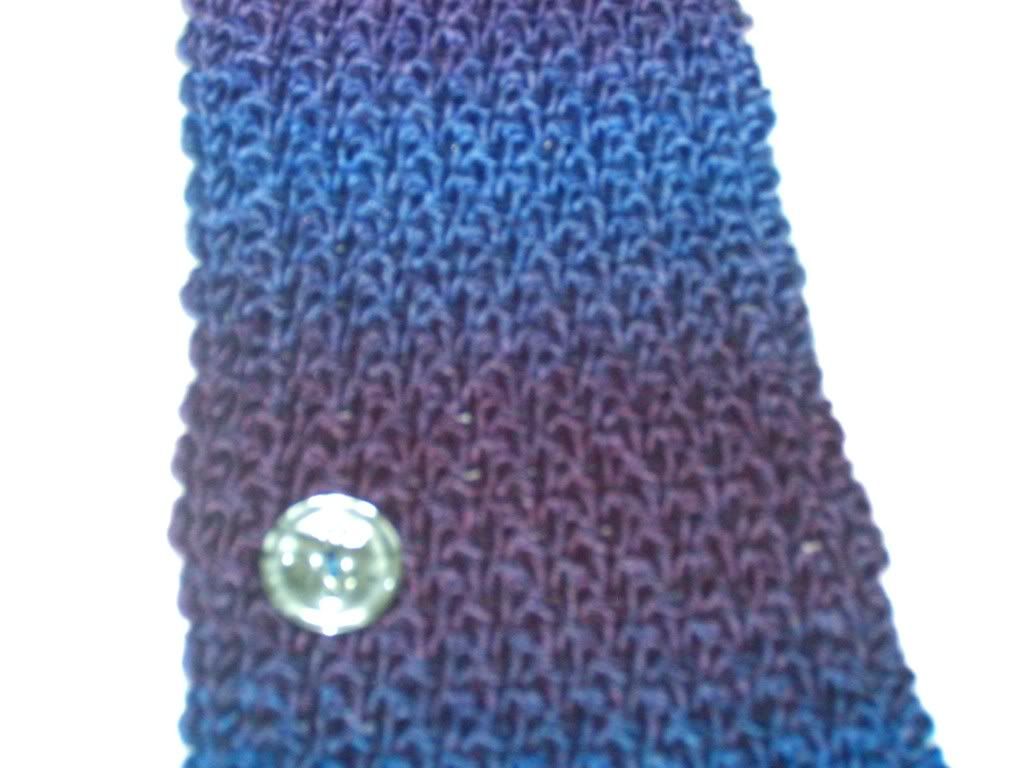
Woven (but crocheted) neckwarmers:
(c) Vicki Suan, Dec 2008
I can't stop making these. They crochet up so quickly.
hook size US I (9) 5.5 mm
any worsted weight wool. I used 1 skein Debbie Mumm's Traditions , 148 yards with plenty leftover. My neckwarmer was 29" long.
abbreviations:
sc = single crochet
ch = chain
sp = space
I chain 23 (or any odd number you like, more or less, to make it wider or narrower).
Row 1 : Sc in 2nd chain from hook. Sc in next ch. *ch 1, skip next ch, sc in next. Rep from * until you reach the last ch. Ch 1, turn.
Row 2: Sc in same sc below, sc in next ch 1 space. *ch 1, skip next sc, sc in next ch 1 space. Repeat from * to the end of row. ch 1, turn.
Repeat row 2 for as long( or as short) as you want. Make it a scarf or a neckwarmer as pictured. A longer scarf will use up more yarn. You may need more than 200 yards.
As with my neckwarmer, when I reached 27", I did my buttonholes (there are 2).
Buttonholes:
I did the pattern over the next 4 sts. Ch 3, skip the next 3 sts, and continue in pattern up to 7 sts before the end of row. Do another ch 3, skip the next 3 sts, and continue in pattern.
For the next row, when you reach the two ch 3 spaces, think of it as just 3 stitches and just continue the pattern over them.
Repeat row 2 for another 2 rows and finish off. Weave in ends and sew your buttons. Fold the scarf over your neck as pictured. As it overlaps, you will sew the buttons where the buttonholes fall. (sorry, I'm not very good at drawing a schematic).
Note: This is a rough draft and is not pattern tested. I welcome questions, suggestions, corrections, etc, etc.
As 2009 comes, I hope to share more free patterns. I am so inspired by the thousands of Ravellers who share their patterns freely on Ravelry. They are so generous.
Wednesday, February 27, 2008
This is the way I do my strings...
I use any old phone books or yellow pages. Some of you recycle. I cut mine up. The pages are very thin and perfect for foundation. I cut mine into 6.5" squares. Use an old rotary cutter (not the one you use for fabrics).
I sew on the strips (any scraps)onto the paper diagonally, like this. The first strip in the middle is right side up. I do the flip and sew.

Press the irregular squares with the paper intact. I usually do 5-6 squares at a time.
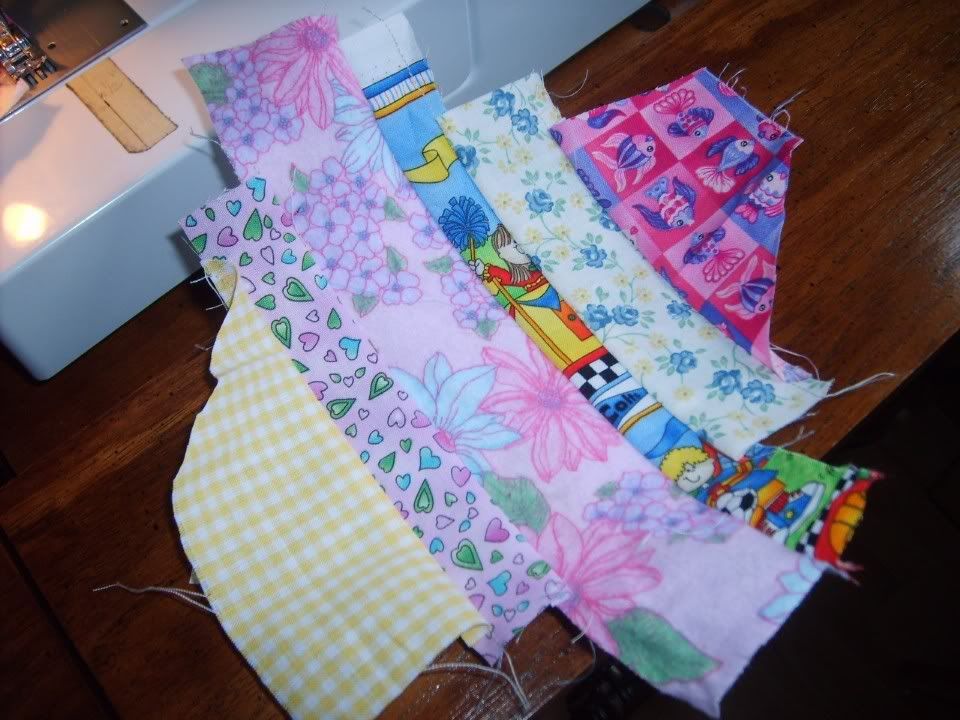
Turn the squares over and cut. Use the paper as guide. You now have a 6.5" square of diagonal strings. You can remove the paper at this point. Be careful that you don't unravel the stitches.
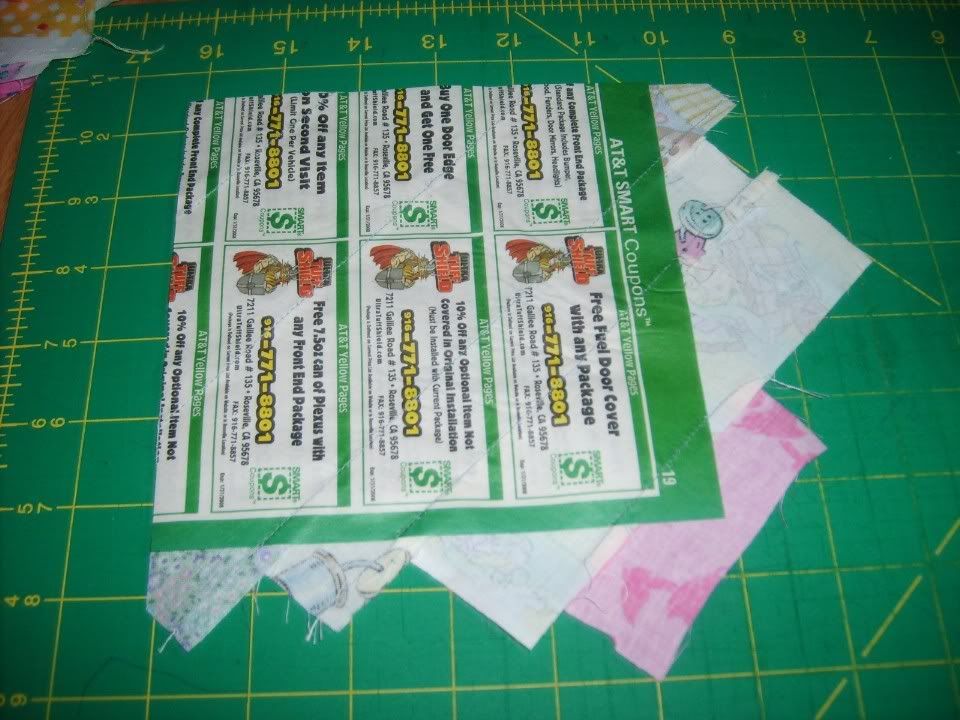
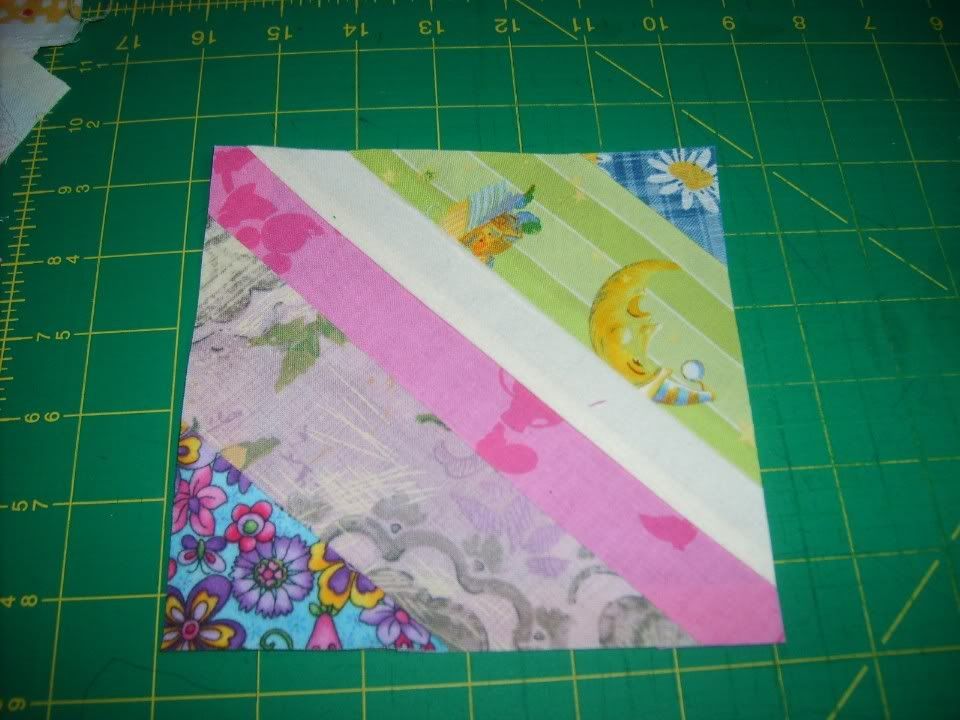
Sew 4 smaller squares into a bigger 12.5" square, like this:

And this is my semi-finished quilt (without borders yet).

This is going to be a baby quilt. You can do it in all blue fabrics or fall colors (my fave) or any colors you want. Use your scraps, use your stash, use your Japanese fabrics, or batiks. Have fun!
Monday, February 04, 2008
I have re-knitted this pattern as written and did not see any errors. Here is the latest picture:
I've been racking my brains as to why others are not able to get the same fabric as pictured. The only thing I can think of is in row 2.
There is a K1 in the beginning of row. You don't repeat this K1. The repeat is from *YO, k2tog* to the end of row.
Another thing I'm thinking of is that I knit Continental, with the working yarn held in my left hand. I'm not a thrower. When you "throw" your yarn with the right hand, it is easy to drop or miss a Yarn Over.
Pattern Freebie, Big Net Lace Scarf pattern
All of a sudden, I've had requests for this pattern from my old, now defunct, website. so, I'm putting it up here:
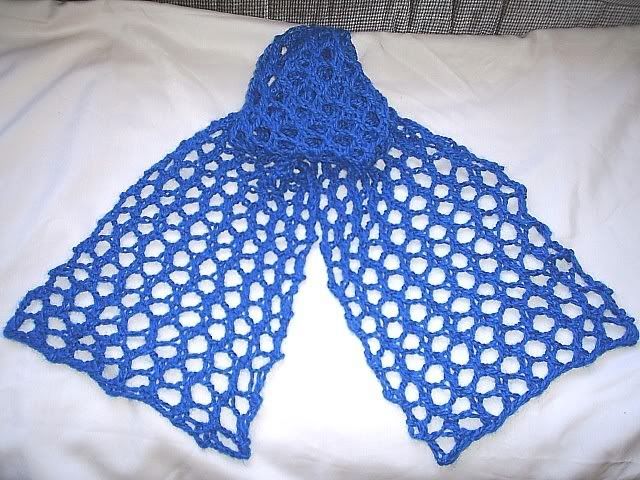
I used a skein of Chunky weight Baby Alpaca, about 100 gms, 108 yards, and US size 15 ( 10 mm) needles.
Abbreviations: K – knit; tog-together; SSK-slip, slip, knit; YO-yarn over
Big Net Lace Scarf:
Cast on 17 stitches (must be an odd number of stitches)
Row 1 : Knit
Row 2: K1, * YO, k2tog * ; repeat from * to * to the end of row.
Row3: Knit
Row 4: * SSK, YO*; rep from * to * to the end of row, ending with K1
Row 5: Knit.
Repeat rows 2-5 until you have just enough yarn to bind off. Make sure you end with row 5 and bind off loosely.
I’m sure you can use any type of yarn, worsted, sport, lace weight. Adjust the number of stitches, make it narrower or wider. Play with it.
The pdf link is here on Ravelry.
© 2005-2008 Vicki Suan for Suanknits.


